Just like an average email providers site, you can customize iCoreExchange to meet your preferences. This article will walk you through the different ways you can customize iCoreExchange.
By selecting Settings from the bottom of the Modules Bar, you will have the following options to choose from:
- User Interface
- Mailbox View
- Composing Messages
- Displaying Messages
- Address Book
- Special Folders
- Server Settings
- Calendar
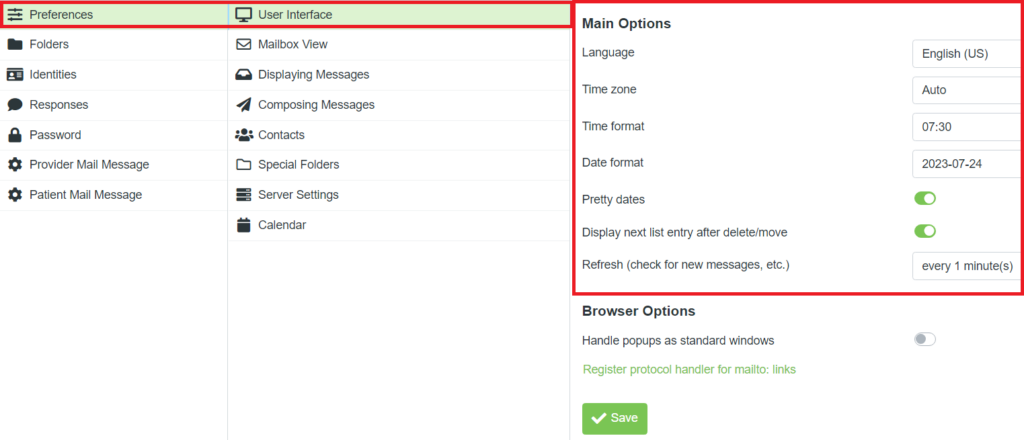
User Interface
Main Options
1. Change your preferred Language by selecting from the options in the drop-down menu.
2. Time Zone default setting is Auto. There should be no need to change this setting but if needed, select from the time zones in the drop-down menu.
3. Select the Time Format from the drop-down menu to change how the time is displayed.
4. Select the Date Format from the drop-down menu to change how the date is displayed.
5. Pretty Dates is selected by default. Do not change.
6. Select the Refresh (check for new messages, etc.) drop-down menu to change how frequently the site will refresh to check for new messages, etc.
Browser Options
1. The Handle popups as standard windows option is disabled by default.
| Important: |
|---|
| Be sure to select the Save button if you’ve made any changes. |
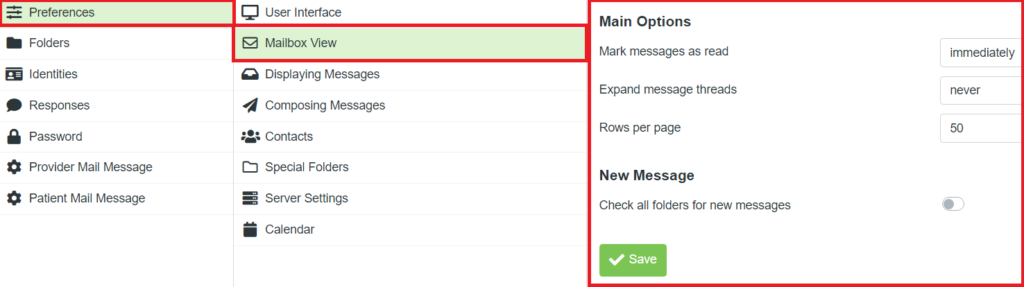
Mailbox View
Main Options
1. Mark messages as read will allow you to change or delay how soon to mark the email message as read.
2. Expand message threads allows you to choose if you would like to see all previous messages or just previous unread messages on email threads.
3. The Rows per page option will allow you to specify how many rows of emails you would like to see on the inbox page.
New Message
1. Enable the Check all folders for new messages if you want iCoreExchange to always check all folders for any new email messages.
| Important: |
|---|
| Be sure to select the Save button if you’ve made any changes. |
Displaying Messages
Main Options
1. Enable the Open message in a new window option to always open messages in a new window when selected.
2. Enable the Show email address with display name option to always show the display name from your mailing list versus showing the full email address.
3. Enable the Display HTML option to always show messages in an HTML format.
4. Select the Allow remote resources drop-down menu to choose if and when images on incoming emails should be displayed in the body of the email instead of attachments. Never is selected by default, which means images will be shown as attachments.
5. Enable the Display attached images below the message option if you would like to have all attached images be shown in the body of the email message, below the text when sending.
| Important: |
|---|
| Be sure to select the Save button if you’ve made any changes. |

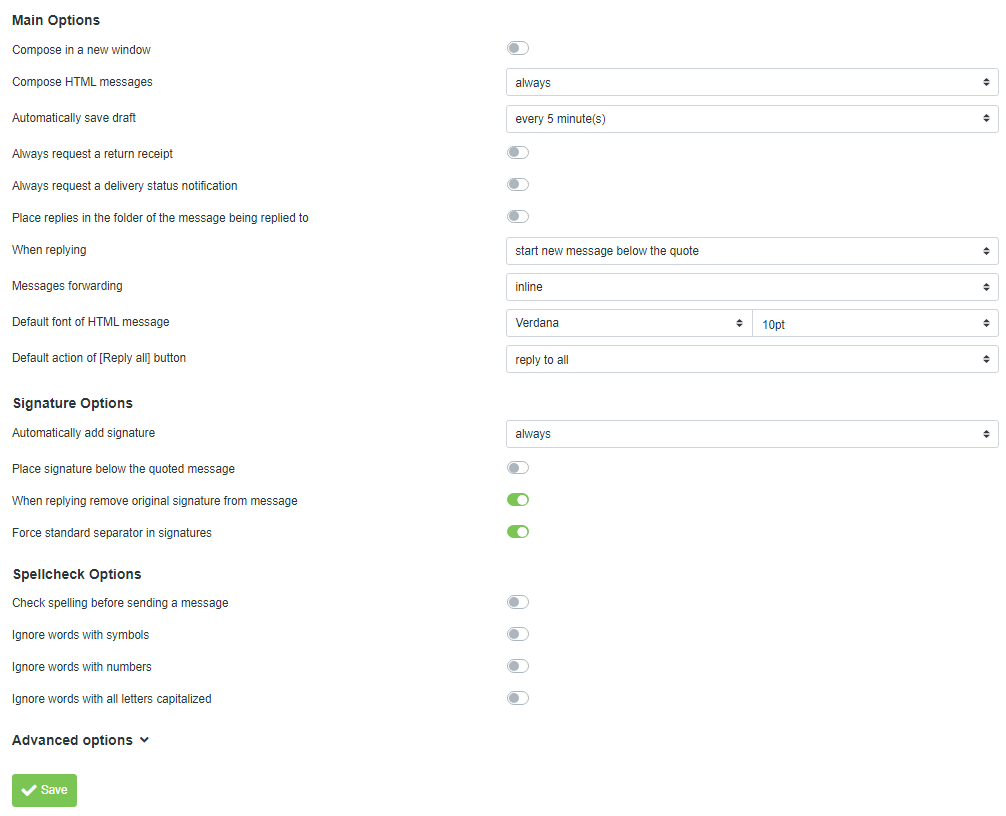
Composing Messages
Main Options
1. Enable the Compose in a new window option to always open a new window when composing a new email message.
2. Select the Compose HTML messages drop-down menu to choose when to write email messages in HTML format.
3. Select the Automatically save draft drop-down menu to choose how often to auto-save email messages as you are composing them.
4. Enable the Always request a return receipt option if you prefer to always receive a confirmation your email was received.
5. Enable the Always request a delivery status notification option if you would like to have delivery status notifications on the emails you have sent.
6. Enable the Place replies in the folder of the message being replied to option to automatically place replies into the same folder you have previous messages.
7. Select the When replying drop-down menu to choose how to start a new message when replying to a message.
8. Select the Messages forwarding drop-down menu to change if you would prefer the original messages to be included as an attachment or inline with the current message when forwarding.
9. Select the Default font of HTML message drop-down menu to change the default setting for the font style and size when composing messages.
10. Select the Default action of [Reply all] button drop-down menu to choose to automatically reply to all or to reply only to the people found in your mailing list.
Signature Options
1. Select the Automatically add signature drop-down menu to choose when to automatically add your signature.
2. Enable the Place signature below the quoted message option to place your signature below quote in message.
3. Enable the When replying remove original signature from message option to have the original signature removed when replying.
Spellcheck Options
1. Enable the Check spelling before sending a message option if you prefer to run the spell checker before a message is sent.
2. Enable the Ignore words with symbols option to have spell checker ignore any words with symbols in them.
3. Enable the Ignore words with numbers option to have spell checker ignore any words with numbers in them.
4. Enable the Ignore words with all letters capitalized option to have spell checker ignore any words with all capital letters.
| Important: |
|---|
| Be sure to select the Save button if you made any changes. |
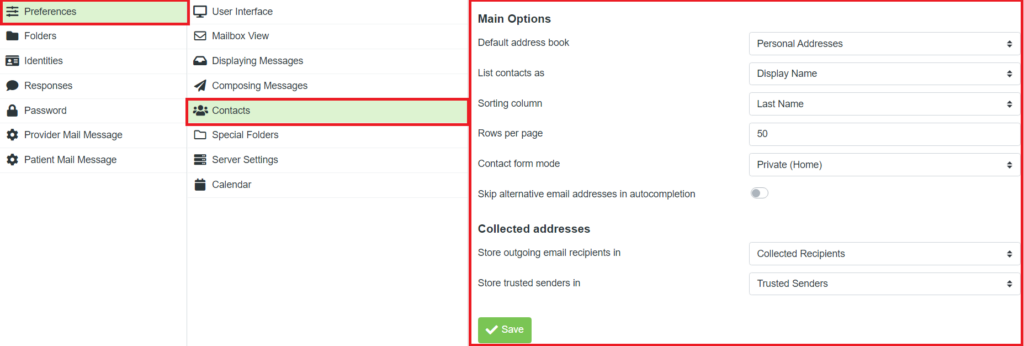
Contacts
Main Options
1. Select the Default address book drop-down menu to choose which address book you prefer to automatically use.
2. Select the List contact as drop-down menu to choose how you would like to view a contact when composing a message.
3. Select the Sorting Column drop-down menu to choose if you would like email messages to be sorted by Display Name, First Name or Last Name.
4. Select the Rows per page to choose how many email messages you would like to be listed on one page.
5. Select the Skip alternative email addresses in autocompletion checkbox if you would like to ignore any alternate email addresses during auto completing while composing a message.
6. Select the Store outgoing email recipients in drop-down menu to choose where to store outgoing email recipients.
7. Select the Store trusted senders in drop-down menu to choose where to store trusted senders.
| Important: |
|---|
| Be sure to select the Save button if you’ve made any changes. |
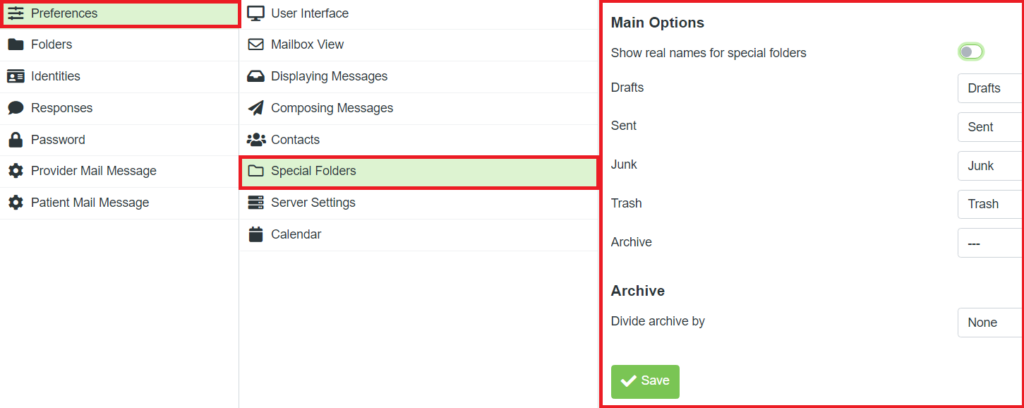
Special Folders
Main Options
1. Enable the Show real names for special folders option if you have changed the names of folders, checking this box will display the actual/real name of the folder.
For example, if you have added your Gmail account and renamed the Spam folder to Junk; when you check this box the name shown will be Spam. If you leave the box unchecked the folder name displayed will be Junk.
2. Select the Drafts, Sent, Junk, Trash, or Archive, drop-down menu to change/move to a created folder in the list.
3. Select the Divide archive by drop-down menu to change/move to select how the archive is divided.
| Important: |
|---|
| Be sure to select the Save button if you’ve made any changes. |
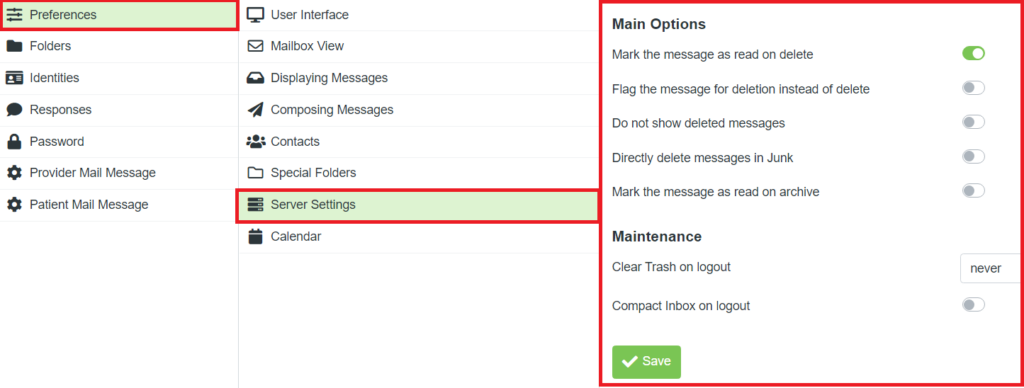
Server Settings
Main Options
1. Enable the Mark the message as read on delete option to have messages marked as read when you delete them. Uncheck the box if you want messages to remain unread.
2. The Flag the message for deletion instead of delete is currently unavailable.
3. The Do not show deleted messages feature is currently unavailable.
4. Enable the Directly delete messages in Junk option to delete a message if moved to the Junk folder.
5. Enable the Mark the message as read on archive option to have messages in the archive marked as read.
Maintenance
1. Select the Clear Trash on logout drop-down menu if you would like to have the Trash folder emptied when you log out.
2. The Compact Inbox on logout feature is currently unavailable.
| Important: |
|---|
| Be sure to select the Save button if you’ve made any changes. |
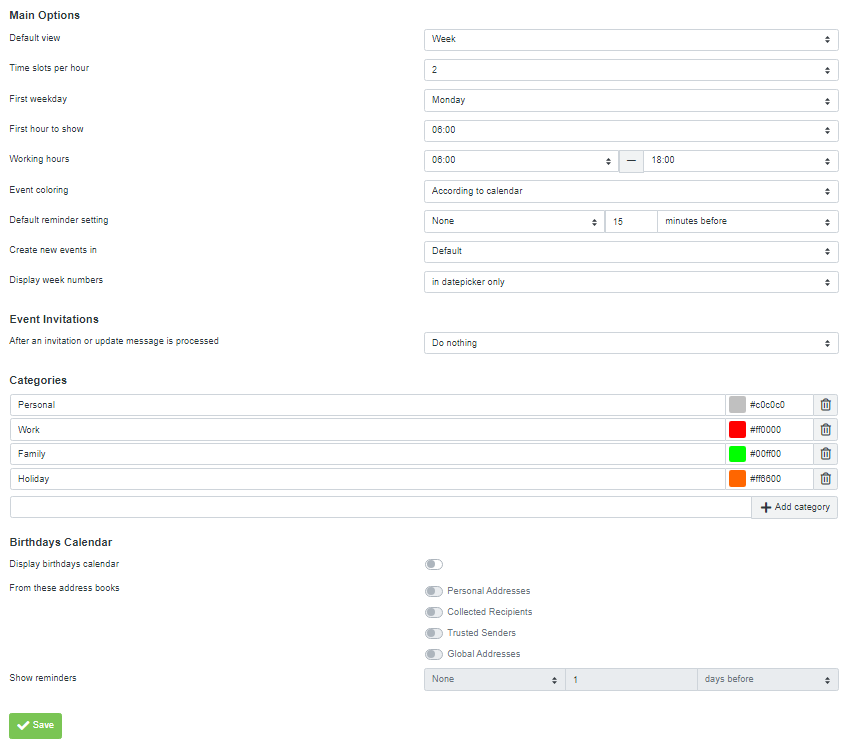
Calendar
Main Options
1. Select the Default View drop-down menu to change the display of the calendar to Day, Week, Month or Agenda viewing.
2. Select the Time slots per hour drop-down menu to select how many slots are available per hour.
For example, if you select 2 there will be two thirty minute slots available per each hour. If you select 6, there will be six ten minute slots available per each hour.
3. Select the First Weekday drop-down menu to choose which day of the week you would like the week to start at in the Calendar.
4. Select the First hour to show drop-down menu to choose starting time for the day to be shown in the Calendar.
5. Select the Working hours drop-down menu to choose the correct block of time that is your “workday”.
6. Select the Event coloring drop-down menu to change how an event is displayed.
7. Select the Default reminder setting drop-down menu to select if you would like a message sent to remind you of an up coming event.
8. The Default reminder time feature allows you to choose minutes, hours or days before or after an event to send you a reminder. Enter the number and select the minutes, hours or days in the drop-down menu.
9. The Create new events in selection should remain as Default.
Event Invitations
Select the After an Invitation or update message is processed drop-down menu to change how to handle an invitation or updated invite has been completed.
Categories
In the categories section you can rename, change the color, delete or create new categories.
Birthdays Calendar
You can choose to display an additional calendar specifically for birthdays.
1. To turn on the Birthdays Calendar, enable the Display birthdays calendar option.
2. Once selected, you can select in the From these address books section which address book to use to build the Birthdays Calendar.
3. You can choose to have a message sent to remind you of upcoming birthdays. Select the Show reminders drop-down menu and select Message. You can then schedule the reminders to show you how many minutes, hours or days are before a birthday.
| Important: |
|---|
| Be sure to select the Save button if you’ve made any changes. |