Welcome to iCorePay, where creating an invoice is easy and accessible! You can create an invoice from the dashboard, invoice, or the patient tab.
Step 1:
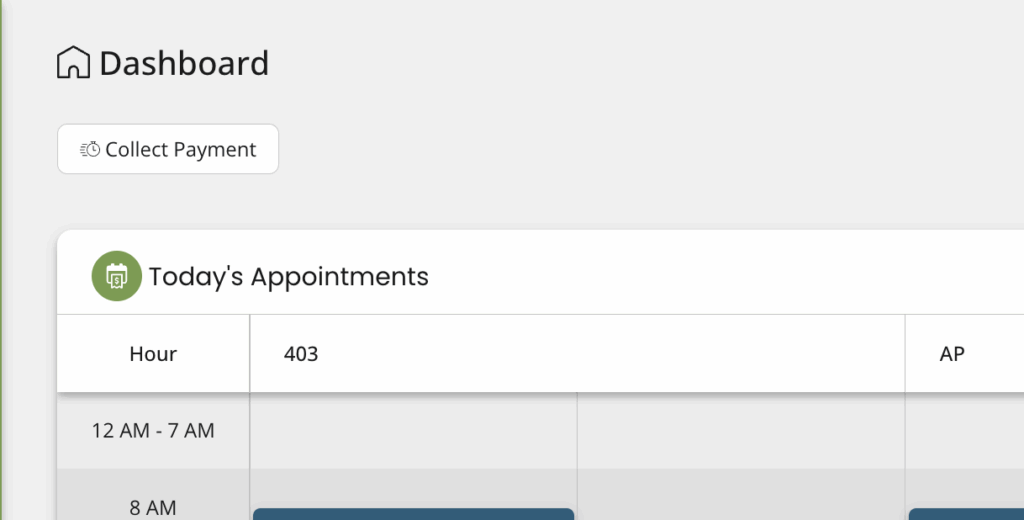
From the Dashboard or Invoice tab: Create an invoice by clicking on the Collect Payment button, or clicking on an appointment in Today’s Appointments, located at the top left of the page under the page title.
Step 2:
From the new invoice creation popup (or the patient’s appointment) you will want to ensure the patient data is properly filled out & populated by using the Patient Search bar at the top.
New Invoice Creation:
- Search for, and select, the patient you’d like to invoice.
- In this window, you are able to search existing patients by name, email, or date of birth.
- When selecting a patient from the search bar, their information will autofill the data from your dental practice management system.
- You are also able to manually enter a patient (note, if you have a write back integration, these payments will NOT be written back!).
- Patient information on the invoice can be edited, including, the address, email, and phone number.
- After you select or enter your patient, enter an amount under the “Amount” field located at the bottom of the invoice creation page.
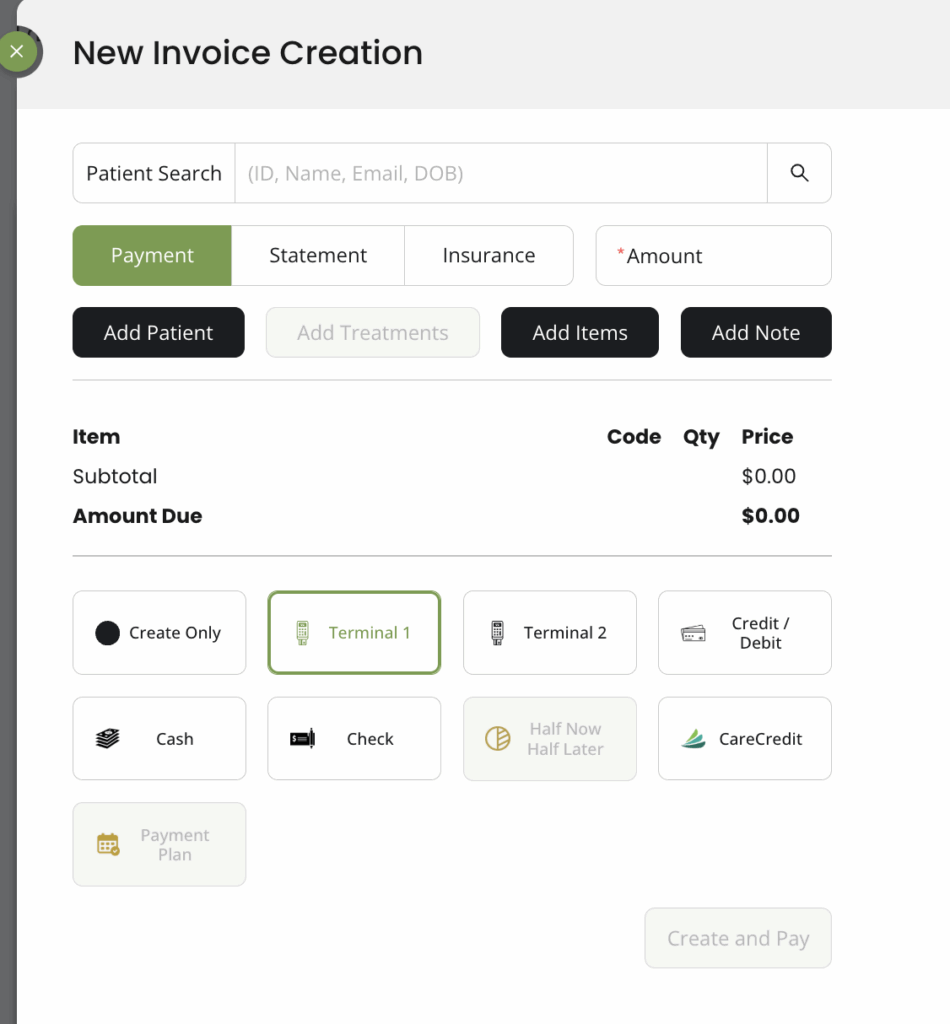
- Click “Create and Pay” to go to the payment page.
- On the payment page, you will be directed Credit/Debit payment method enabled in your practice, for a faster payment experience.
- If you need to change the payment method selected, click cancel and choose a different payment method.
Step 3: (optional)
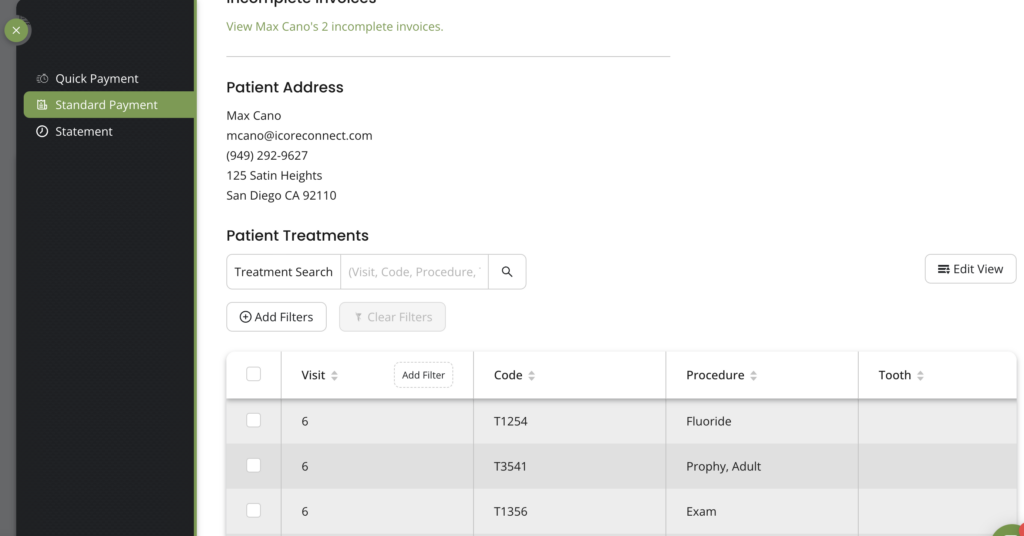
- If your practice management system has treatments integration AND the selected patient has treatments/procedures assigned to them in your practice management system, these will show here
- Use the arrows on the columns to sort or use the ‘Treatment Search’ section to find the treatment you would like to bill for.
- Select treatments by clicking the check box to the left of the treatment. You can select any number of treatments or none at all.
- Click ‘Continue’
Step 4:
- OPTIONAL: Enter a reference ID of your choice, preferably an ID that references invoices to your data management portal.
- OPTIONAL: Under item name, enter the procedure or simply scroll down the list to select the procedure for your invoice.
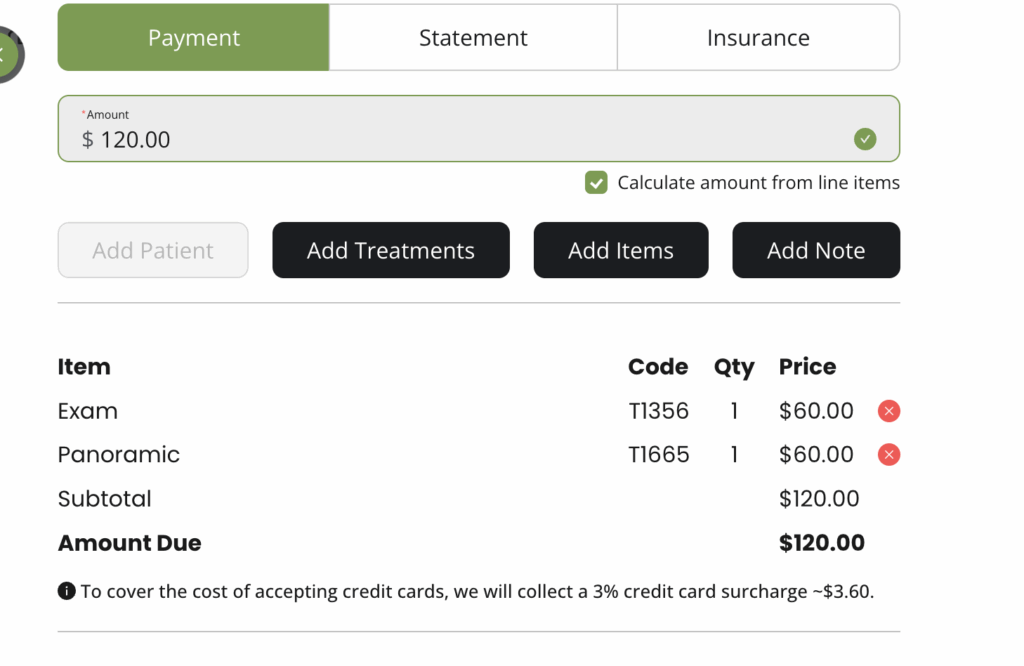
- Confirm the quantity. Invoice totals automatically update when quantity is adjusted.
- To add additional items, click on the “add invoice item” button under procedure details.
- You also have the option to remove added items by clicking on the red X to the right of the item you wish to remove
- If the total order amount needs to be changed, uncheck the “Calculate invoice amount from line items” box and change the amount.
- The item price can also be adjusted if needed.
Step 5:
- Create the invoice by clicking on the “Create Invoice” icon at the bottom of the window, or create an invoice and go straight to the payment page by clicking “Create and Pay Invoice”.
- You have now created an invoice on iCorePay!
Return to iCorePay Quickstart: Standard Operating Procedure (SOP)