This article will provide a 3-step guide to issuing a refund in iCorePay.
Step 1:
- Only Admin and Write users are able to issue a refund. Contact your administrator if you need to change your user access.
- The payment status must be either “Captured” or “Active Installment” in order to issue a refund.
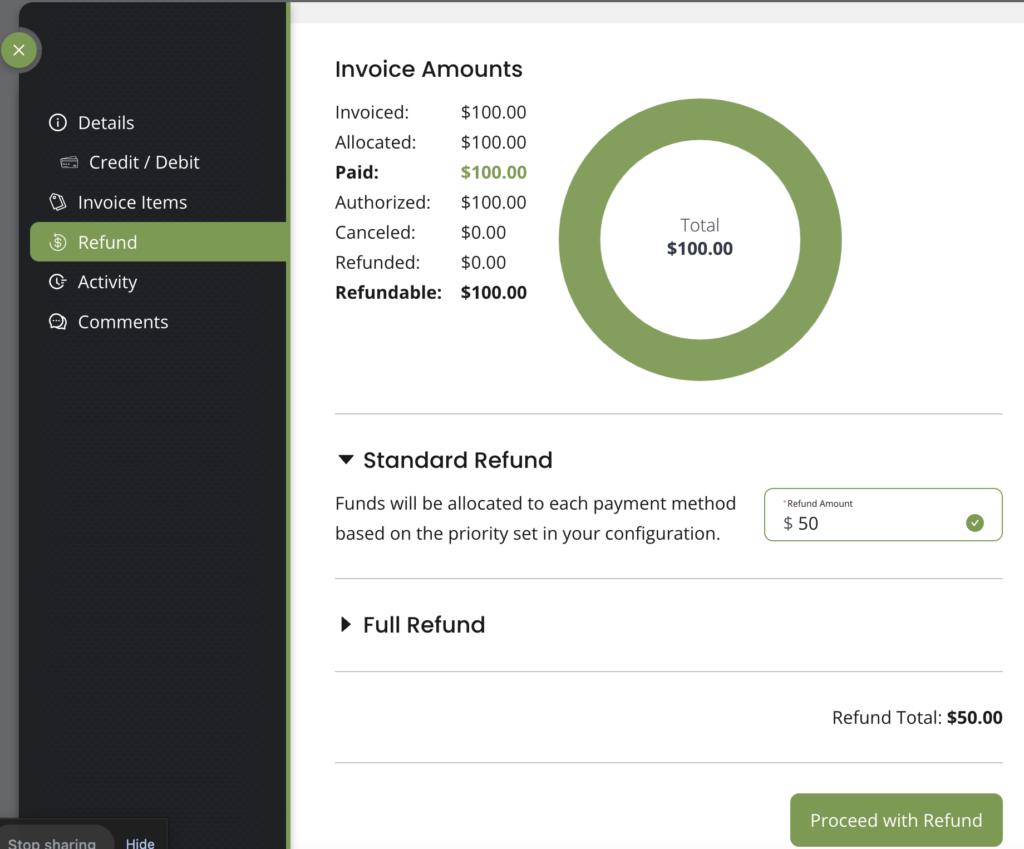
- Select the invoice you wish to refund and click on the “Issue Refund” tab on the left of the invoice.
| IMPORTANT: |
|---|
| We can only refund up to 180 days in the past for iCorePay. |

There are 3 refund options available; standard refund, advanced refund, and full refund.
- A standard refund will allow you to issue a partial refund other than the full amount refundable. If there are multiple payment methods associated with the invoice, funds will be allocated to each payment method based on the priority set in your configuration. No need to calculate anything!
- An advanced refund will allow you to issue a defined refund amount across a specific payment method used on the invoice.
- A full refund will allocate the full amount within the original payment methods used.
Step 2:
- Enter the refund amount you wish to issue and click on “Proceed with Refund”.
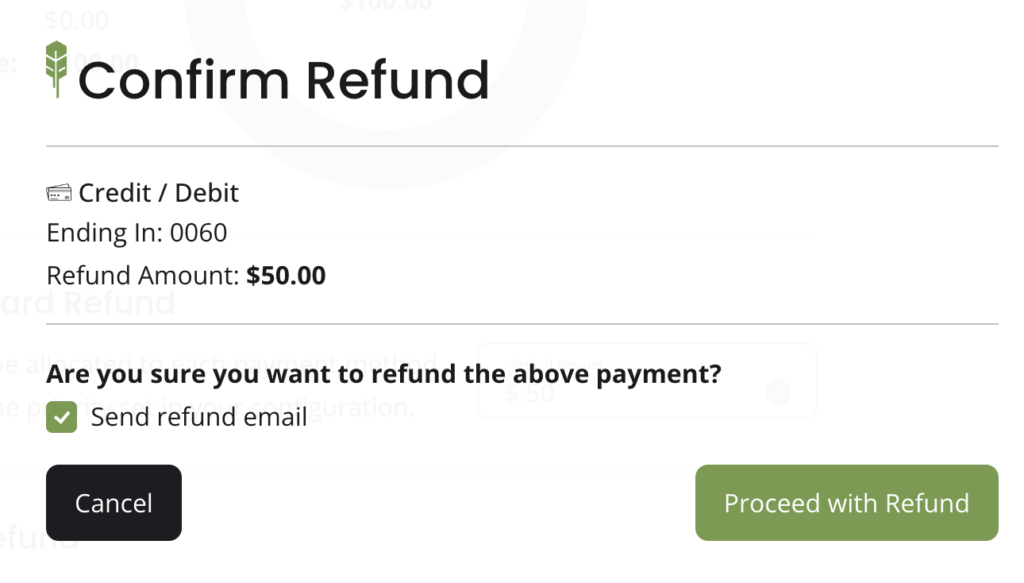
- A confirmation page will pop up showing you the amount and payment method that will be refunded. You can also choose whether or not to send the patient a refund email.
- If you are issuing an offline refund like cash or CareCredit for example, you must select the check box confirming that you took the additional steps to complete the refund outside of iCorePay.
- Example: Cash transaction confirms the appropriate bills/coins have been issued back to the customer. CareCredit refunds must be issued via the provider portal.
- Once you proceed with the refund you will receive a “Refund Successful” message confirming the refunded amount and payment method.

Step 3:
- You’re all set!
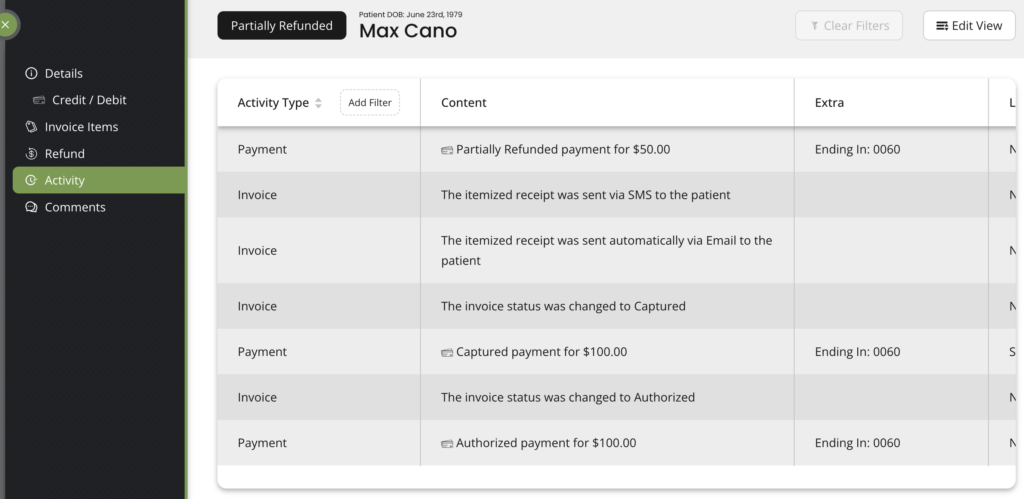
- The invoice status will reflect as “Refunded” or “Partially Refunded”.
- You may view further refund details if needed under the “Activity” tab located on the invoice.

Return to iCorePay Quickstart: Standard Operating Procedure (SOP)
