This article includes instructions on how to schedule or reschedule a Webcam Proofing appointment to continue your EPCS registration, and what to expect during the appointment.
| Quick Tip: |
|---|
| Reminder that during the webcam appointment, you will need to provide two (2) forms of evidence to verify your identity.
Examples of Qualifying Documents are listed below in this article. IMPORTANT: The provider is the only person who can attend the Webcam Proofing and no one can do this on behalf of the provider. |
- How to Schedule or Reschedule your Webcam Proofing
- What to Expect During your Webcam Proofing
- Examples of Qualifying Documents
- Use Activation Code to complete EPCS Registration
- Lost Activation Code
How to Schedule or Reschedule your Webcam Proofing
1. Log into iCoreRx and navigate to the Compose Rx page:
Instructions on How to Login Fully Integrated (Eaglesoft, Dentrix and Open Dental)
Instructions on How to Login Semi Integrated (Standalone).
2. Select a Patient and navigate to your e-prescribing site.
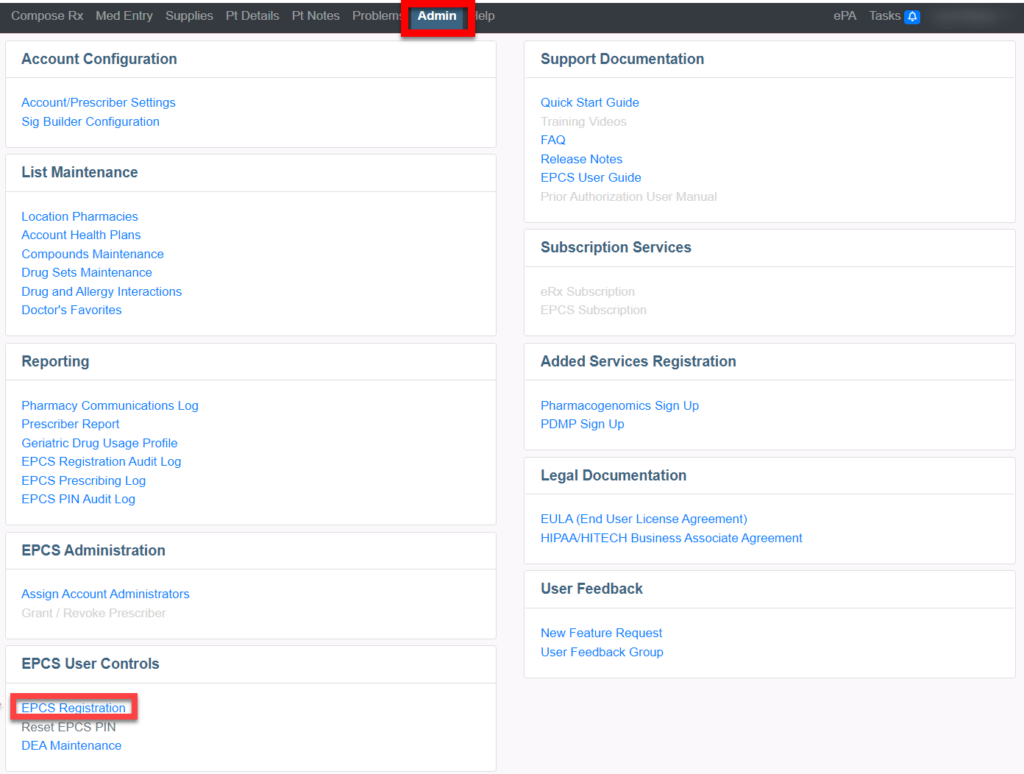
3. Click the Admin tab.
4. Under EPCS User Controls select EPCS Registration and go to Identity Proofing screen (This will launch automatically).
5. From the Identity Proofing section, Click the Schedule button.

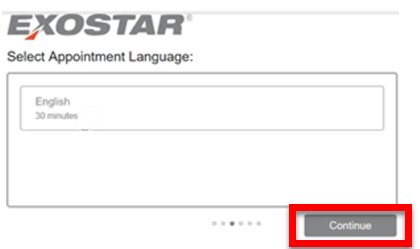
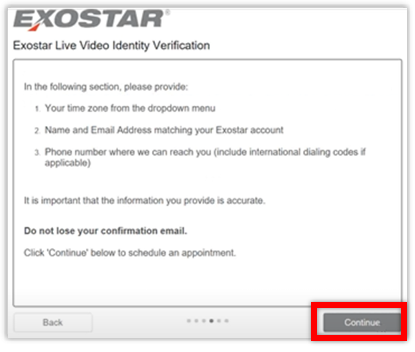
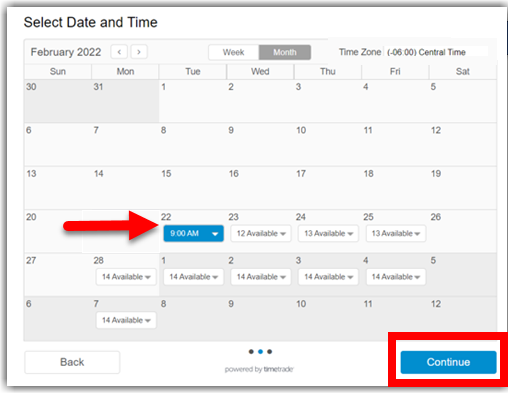
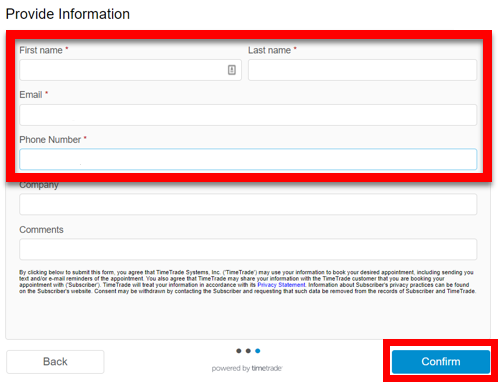
9. Enter your Contact Information. Please provide your First and Last Name, an email address, and mobile phone number.
Add a mobile number and select the checkbox to receive text messages about your upcoming appointment.
10. Click the Confirm button on the bottom right.
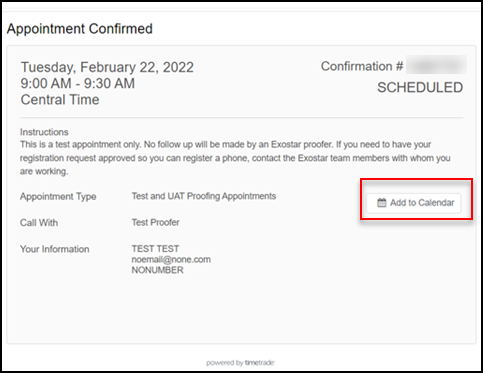
11. A confirmation page will be displayed with the date and time of your webcam proofing.
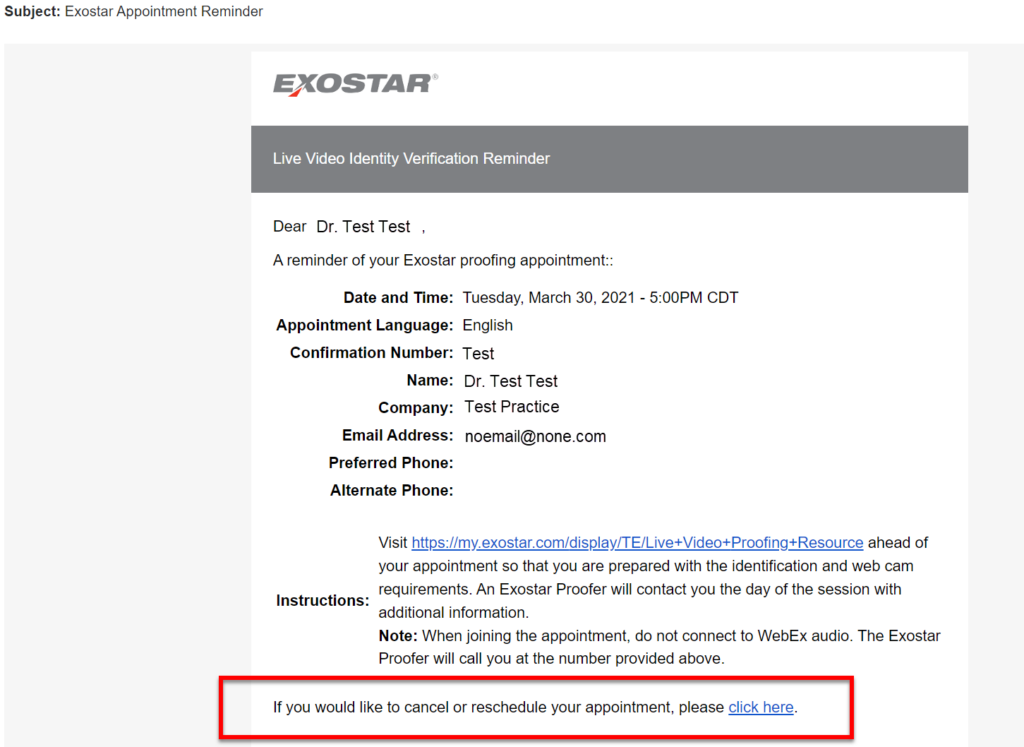
NOTE: You will receive an appointment reminder the day before your webcam appointment.
- If you need to reschedule, a link will be provided at the bottom of the confirmation and reminder emails.
You may click on this link to reschedule before your appointment. - If you miss your appointment, you will need to return to iCoreRx (follow the steps above) and schedule a new appointment.
What to Expect During your Webcam Proofing Appointment
In order to complete your webcam proofing appointment you will need the following:
- Webcam (on your Computer, Laptop, Tablet or Phone).
- Qualifying Documents to prove your identity.
1. Click the link in the email or text message and download the WebEx meeting to start your meeting session.
2. Show the Proofing Agent your Qualifying Documents to validate your identity.
3. Write down the Activation Code given to you by the Proofing Agent.
| Important Activation Code: |
|---|
|
4. You will receive an email confirming that webcam identity proofing is complete.
NOTE: The confirmation email will not contain the Activation Code.
5. Contact the Implementation Team, as soon as possible, they will assist with completing your EPCS registration.
- Email implementation@icoreconnect.com
- Call 888-810-7706
- Schedule an appointment to complete your registration.
Examples of Qualifying Documents
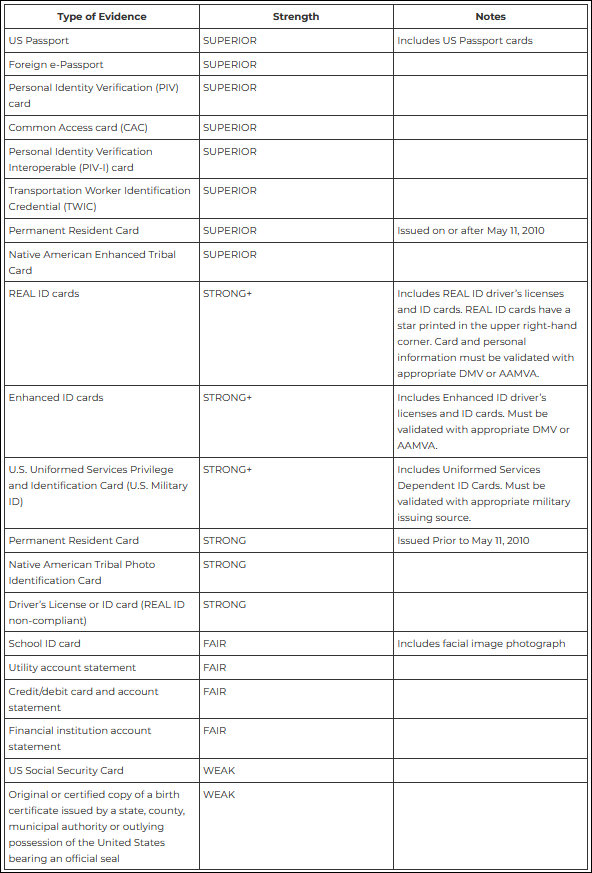
To verify identity, Exostar requires that the prescriber present either:
- Two (2) Strong or Superior pieces of evidence.
OR
- One (1) Strong or Superior pieces of evidence and Two (2) Fair pieces of evidence.
A national list of qualifying documents can be found on the NIST website.
Use Activation Code to complete Part 2 of Provider EPCS Registration
Proceed with the following steps to complete Part 2 of your Provider EPCS Registration.
1. Log into iCoreRx. Select a patient and navigate to the Compose Rx page.
2. Select the Admin tab at the top of the page.
3. Under the EPCS User Controls section, select EPCS Registration and go to Identity Proofing screen (This will launch automatically).

4. From the Identity Proofing section, Click the Resume button.

5. Enter the Activation Code. Click the Submit button.
NOTE: The Activation Code is valid for 30 days.

Click here to be directed to the Provider EPCS Registration Part 2 guide, then go to step 9 to complete your registration.
Lost Activation Code
1. Log into iCoreRx. Select a patient and navigate to the Compose Rx page.
2. Select the Admin tab at the top of the page.
3. Under the EPCS User Controls section, select EPCS Registration and go to Identity Proofing screen (This will launch automatically).

4. From the Identity Proofing section, Click the Resume button.

5. Click the Lost Activation Code button. A new activation code will be mailed to you.
NOTE: The Activation Code is valid for 30 days.

You should expect to receive your new activation code within 5 to 8 business days. Once received, please contact the implementation team as soon as possible so they can assist with completing your EPCS registration. You can contact the implementation team at implementation@icoreconnect.com, or dial 888-810-7706
